
Curved Cedar Deck - Personal Project


Thank you to Canadian Woodworking and Home Improvement Magazine for featuring our deck in an 8 page spread on the design and build process, and they seemed to like our work enough to put it on the cover!
A Reimagining
After living in our new house for two summers, we realized that most of the yard really wasn’t being used. We just weren’t able (or willing) to keep the grass and large planters looking good; and certainly there was no help from the dog on this front. Furthermore, the cement patio and dining set were back by the garage, and it wasn’t the most inviting.
In rethinking the space, the main things desired were:
1) A permanent social fire pit, 2) A dining area and 3) A lounge area. The result was a fully utilized space.

The curved edge blended seamlessly with the existing curved cement pathway, new round firepit and table.

I asked the publication if I could have a try at the photography, and it worked out pretty well.
Design
The basic form of the deck was the product, not just of style, but also of necessity. If the deck edge was straight, either the fire pit or the dining area would not have been workable. Perhaps angled corners might have worked practically, but the aesthetic wasn’t right for the space. By using a deck edge that meandered it’s way through the space, it harmonized spatially not only with the new circular fire pit and round dining table, but also with the existing curving path to the garage.

Lighting adds a warm touch in the evenings, and also adds a level of safety after dark.

Looking back toward the 'barn'. The curve concept fit the feel of the space perfectly.

The skirt and wave edge have no exposed fasteners. The screws (supported by epoxy) are driven from the back; the epoxy not only adds enormous strength, but also adds water resistance to these critical areas.

We wanted this to be as much of a piece of craftsmanship as anything else in the home.
The Build
Below are some general photos from the build process.

This is one of the skirt pieces showing 'kerf' relief cuts to enable bending. Where the skirt meets each joist end plate, the board has no cuts; this is so that the screws can be driven into solid material from the back. Note that approaching each solid area, the kerf depths are graduated, being made increasingly shallower leading up to the solid area: this is so the board won’t snap from a sudden change from thick to thin.

Here are the wet strips of clear cedar are being pressed. This is the pre-press before glue-up: One day wet press, 2 days drying out of the press under tension, then cleaned with acetone, epoxy applied, and back into the press.

Here are semi-finished edge curves being fitted and positioned on the joists. The edge hasn't been sanded or planed yet and still has epoxy on the surface. West System Epoxy (slow cure) is used to laminate the strips instead of white glue, as it is perfectly suited to exterior carpentry. It is completely water-proof and it doesn’t need a super tight fit or perfect surface for a strong and permanent bond.
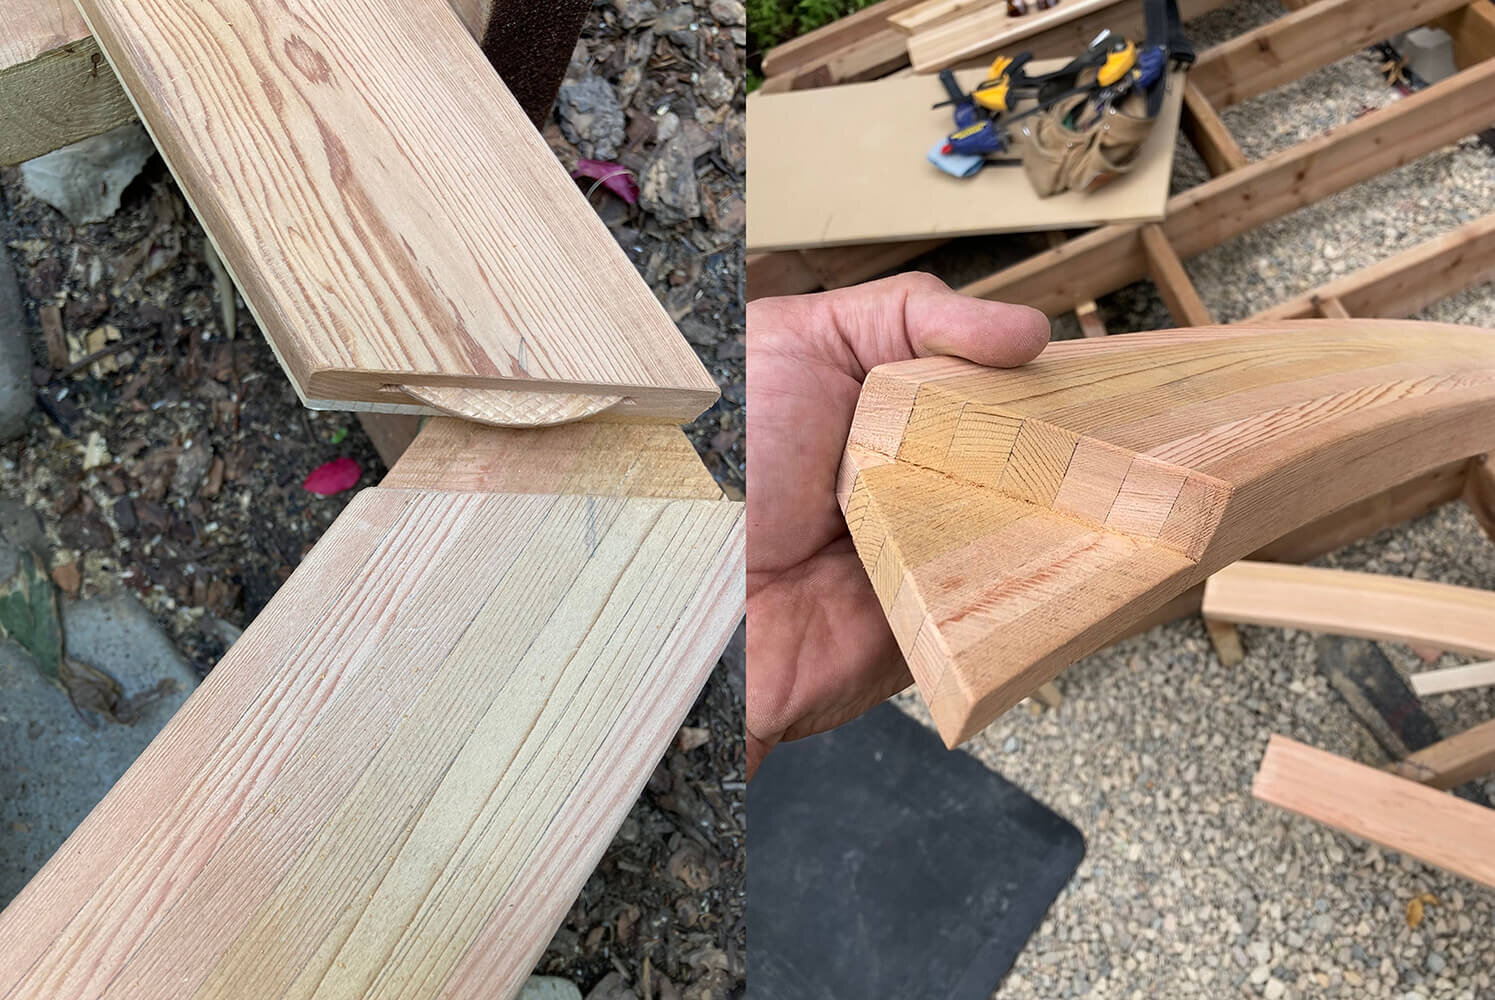
The wave edge corner joints were epoxied mitred half-lap with a biscuit for help in alignment and a little added strength.

Fitting the final edge wave. From here the planking was carefully cut to match the edge, but first the skirt needed to be installed.

With everything fitted and looking good to the inspector, all it needed was some color.
